
About this recipe
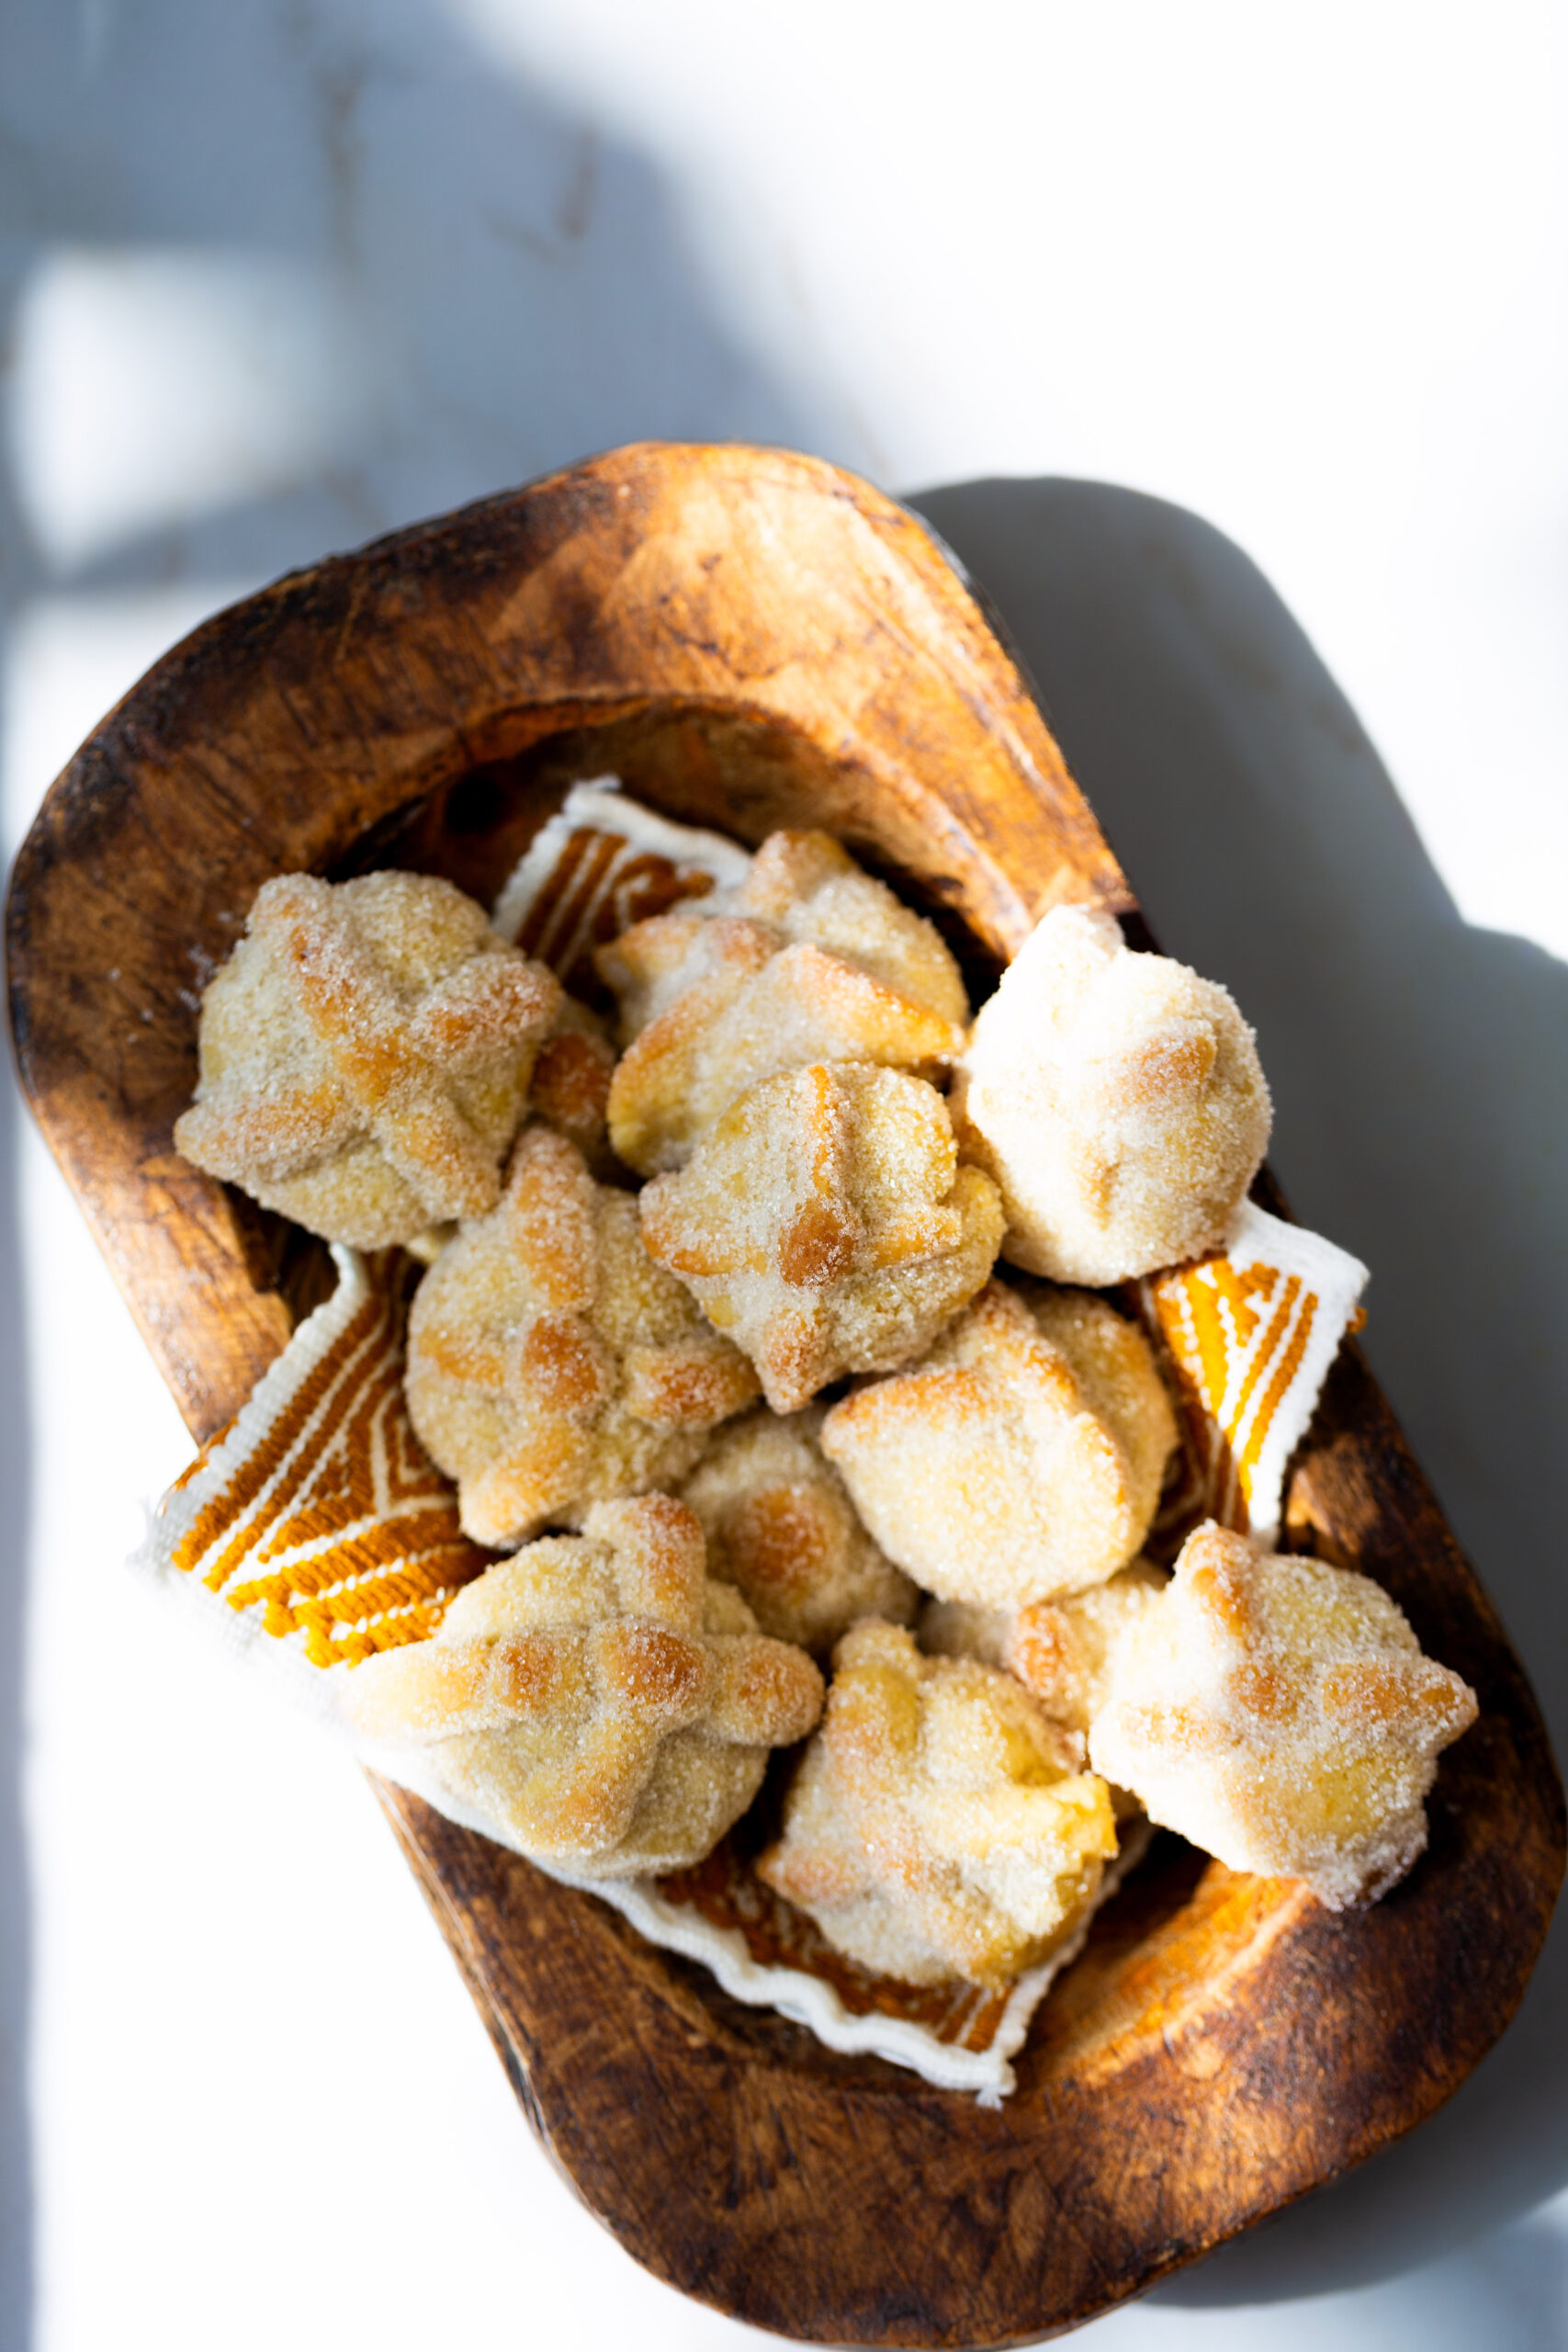
Día de los Muertos, or Day of the Dead, is a Mexican celebration of life and remembrance. Food always plays a big role, and pan de muerto—a sweet, orange-scented bread decorated with “bones”—is one of the most iconic foods.
That same bread inspires these cookies, but they’re much faster and easier to prepare. You get the flavor of pan de muerto in cookie form—perfect for altars, family gatherings, or simply enjoying with coffee or hot chocolate.
Why you’ll love this recipe
- Quick and easy – one bowl, no chill time, done in under 40 minutes.
- Traditional flavor – orange zest and vanilla, just like pan de muerto.
- Family-friendly – simple steps kids can help with.
- Customizable – make them vegan with dairy-free butter.
- Perfect for celebrations – great for ofrendas, classroom activities, or sharing at gatherings.
ingredient notes
- Butter – you can use regular or vegan butter. Room temperature is best.
- Cane sugar
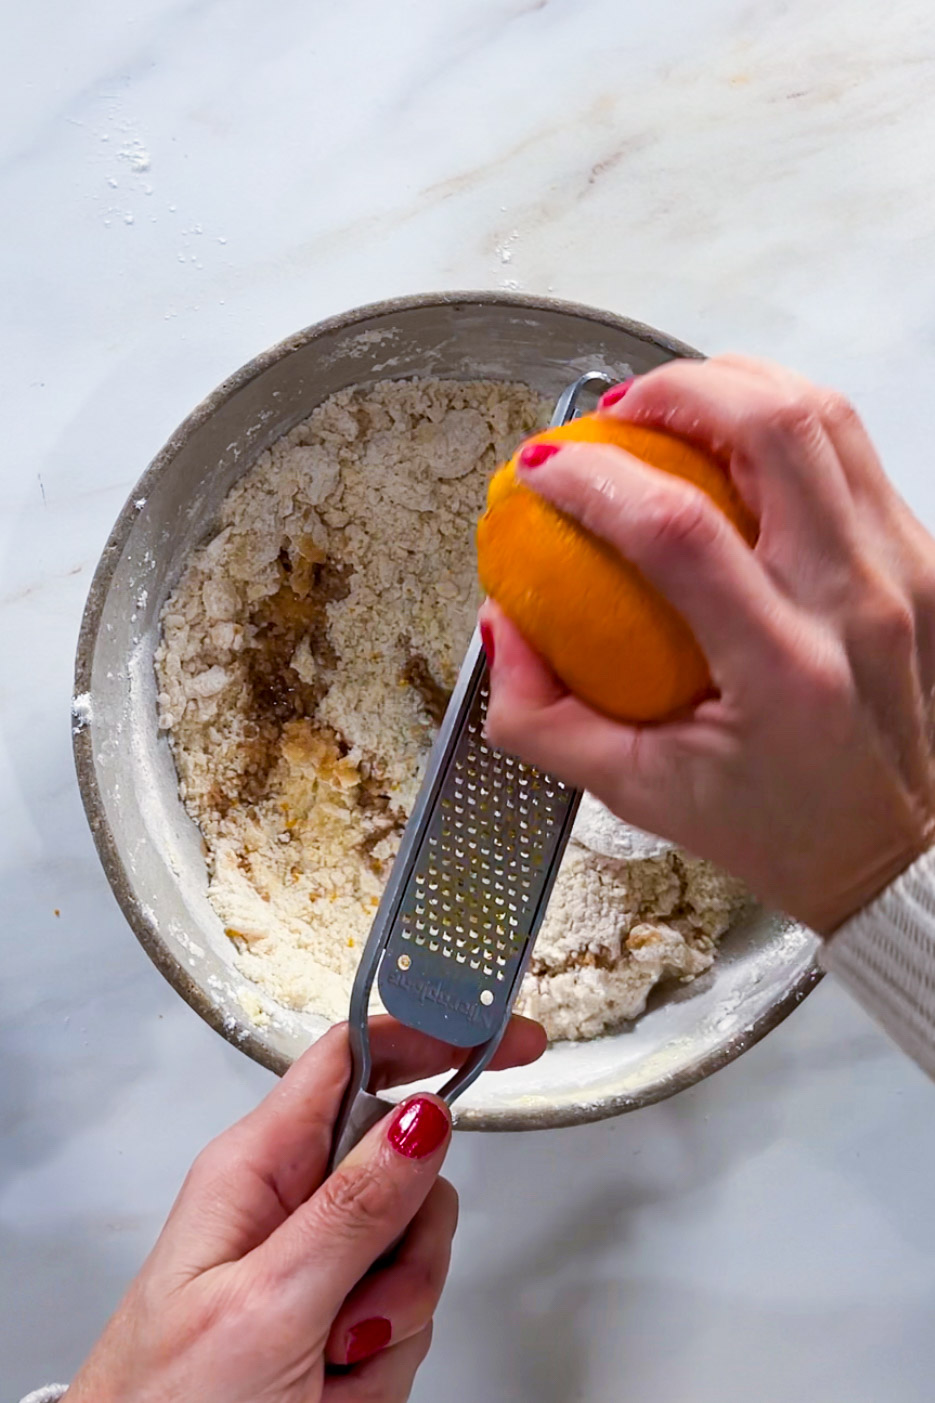
- Orange zest – the key to that traditional pan de muerto flavor. Use only the orange part, not the bitter white pith.
- Vanilla extract – adds depth and warmth.
- All-purpose flour
- Salt

How to make Day of THE DEAD COOkies, step by step
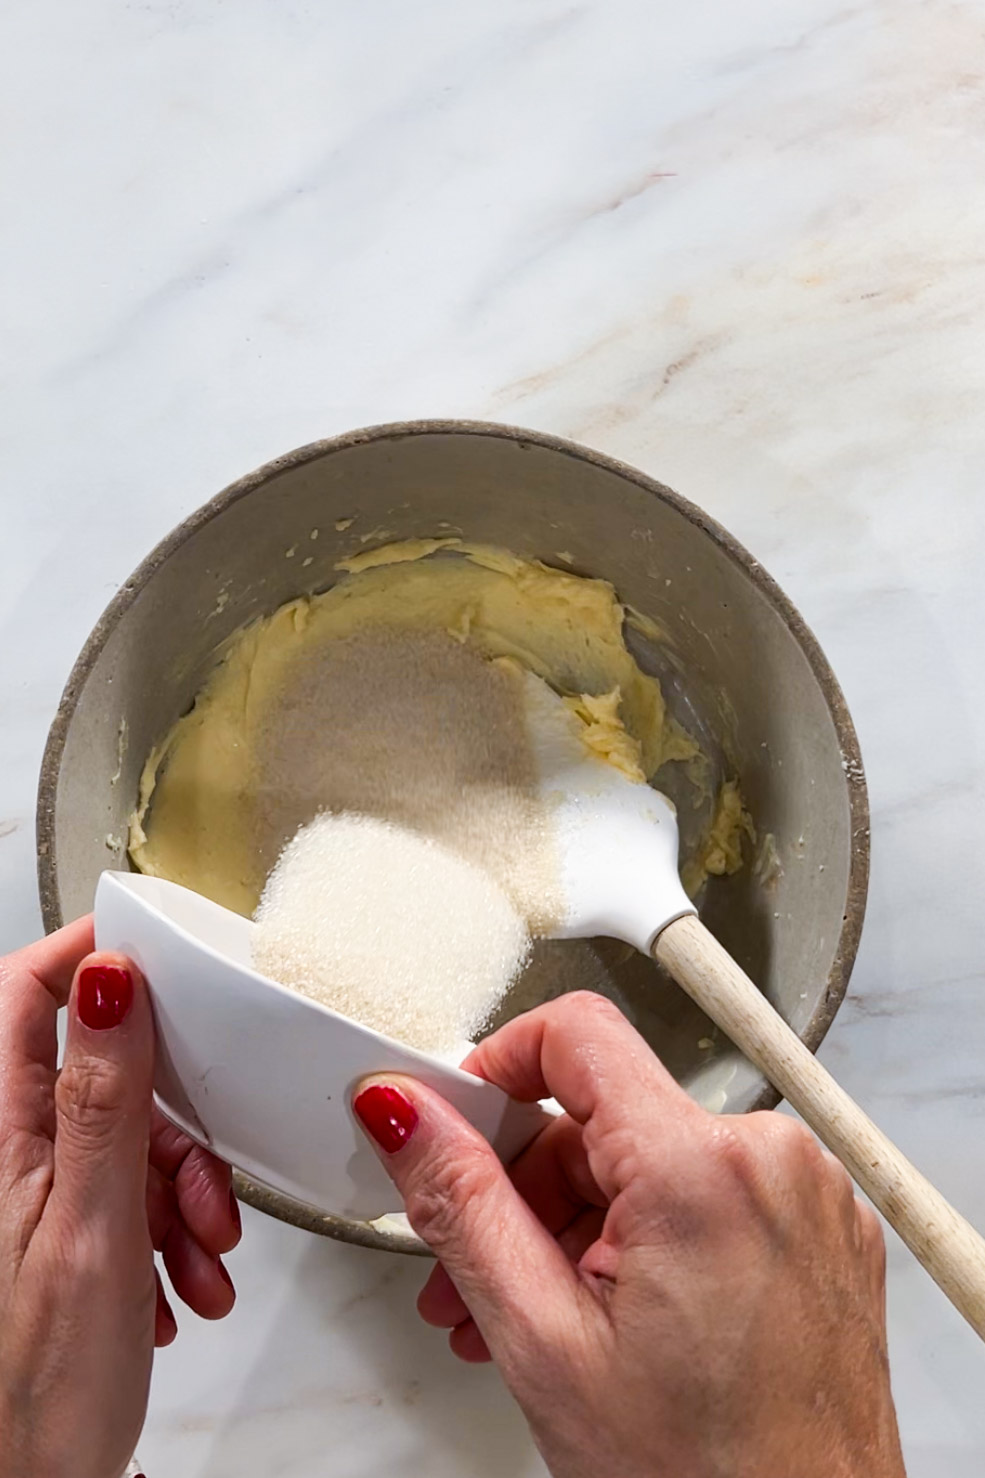
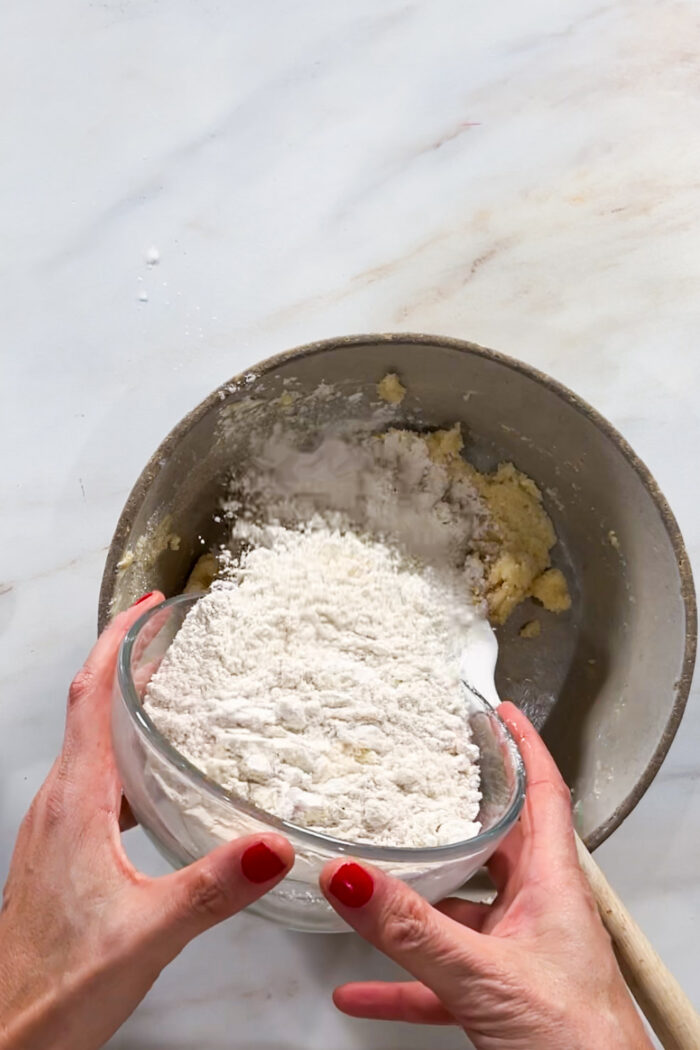
- Make the dough: Cream butter and sugar until smooth. Add salt, vanilla, and orange zest. Mix in flour until a dough forms
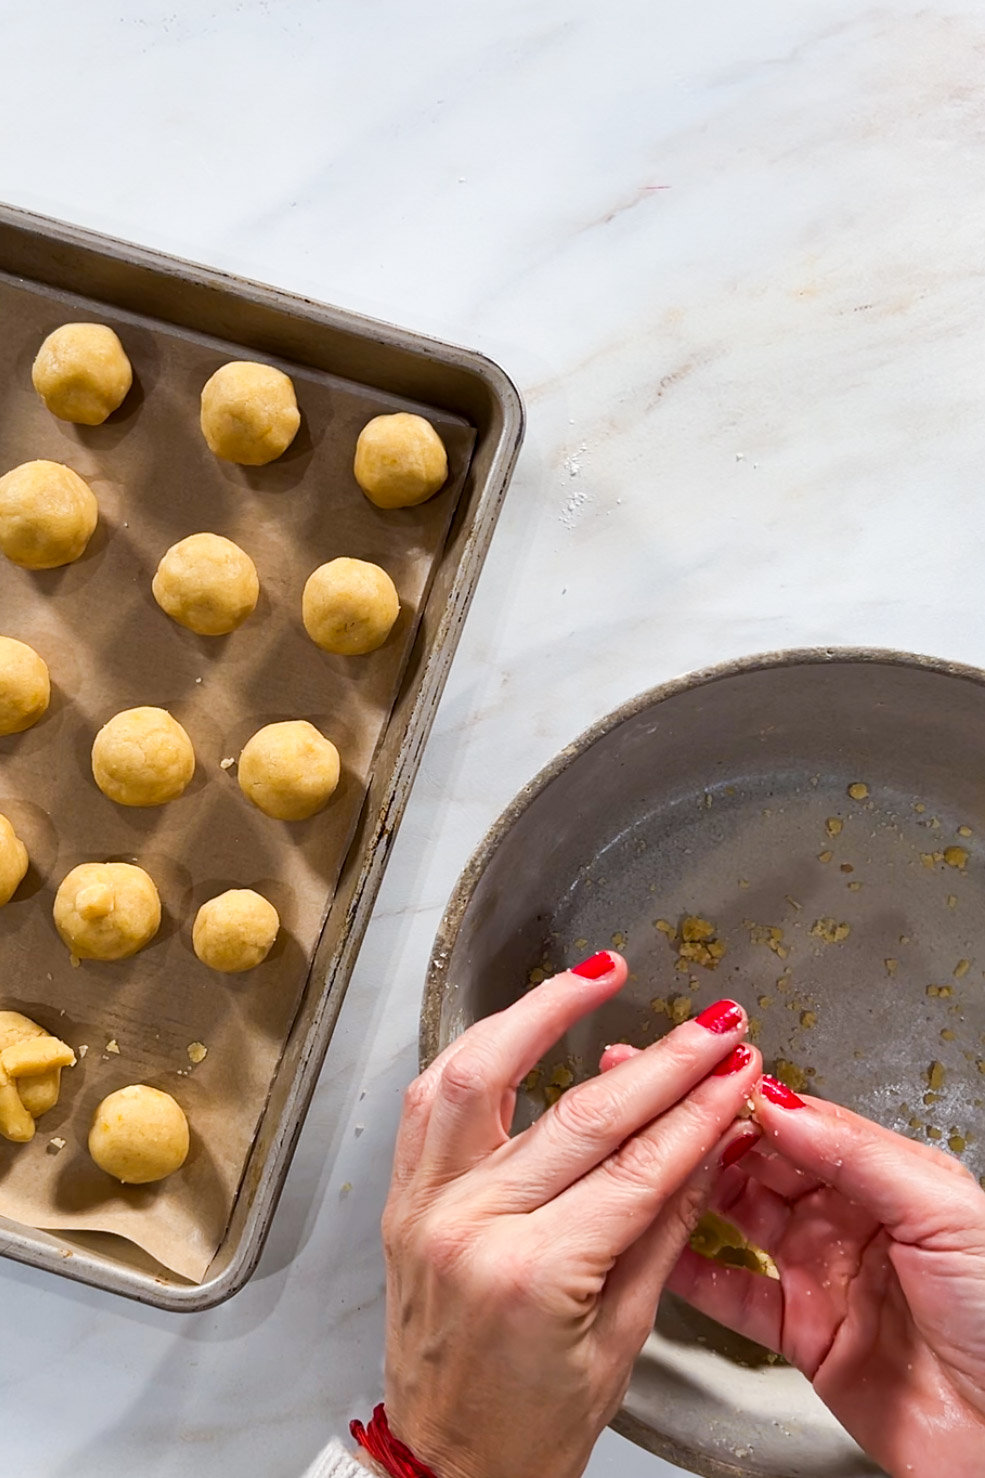
- Shape: Preheat oven to 350°F (175°C). Roll dough into walnut-sized balls. On top, shape small “bones” and a “skull” with extra dough pieces to mimic pan de muerto.
- Bake: Bake 12–15 minutes until lightly golden. Do not overbake—cookies should stay soft in the center.
- Finish: Roll warm cookies in sugar, then let cool on a rack.
Variations
- Vegan Day of the Dead cookies: Use vegan butter.
- Spiced version: Add a pinch of ground cinnamon or anise for a more traditional flavor.
Home cook to home cook tips
- Room temperature butter makes mixing much easier.
- Do not overwork the dough, or your cookies may get tough.
- Bake evenly: Make cookies the same size so they bake at the same rate.
- Residual heat: Remember, cookies continue to cook after being removed from the oven. Take them out when just golden.
- Storage: Keep in an airtight container for up to 4 days. You can also freeze the dough and bake it later.
Celebrating with Day of the Dead cookies
Baking these cookies isn’t just about having a sweet treat—it’s about sharing memories, honoring loved ones, and keeping traditions alive. Put them on your altar (ofrenda), pack them in a box for neighbors, or enjoy them with your family while sharing stories about the people you’re remembering.
Every bite is a reminder of connection, celebration, and love.
Day of the Dead Cookies, Galletas de Día de los Muertos
Equipment
- Electric mixer
Ingredients
- ½ cup butter or vegan butter, 1 stick
- ½ cup cane sugar
- ¼ teaspoon salt
- 1 teaspoon vanilla extract
- Zest of 1 orange
- 1¼ cups all-purpose flour
For dusting:
- ½ cup cane sugar
Instructions
- In a large bowl, cream the butter until smooth and fluffy.
- Add the sugar, salt, vanilla, and orange zest. Mix until combined.
- Gradually add the flour, mixing until the dough comes together.
- Preheat oven to 350°F (175°C). Line a baking sheet with parchment paper or a silicone mat.
- Roll dough into walnut-sized balls. With extra dough, shape small “bones” and a “skull” to place on top of each ball.
- Bake for 12–15 minutes, until lightly golden. Do not overbake—cookies should stay soft in the center.
- While still warm, roll cookies in sugar, then place on a rack to cool completely.
Notes
Nutrition
information
Nutritional information of this recipe is only an estimate, the accuracy for any recipe on this site is not guaranteed.

Hi, I’m Ale Graf!
I’m a Mexican home cook based in Texas and the voice behind AleCooks and Piloncillo & Vainilla.
I create easy, family-friendly recipes with Mexican roots and a plant-forward mindset—always flexible and made to bring people together. I’m also the co-author of Yo Cocino Latino and love helping home cooks feel more confident in the kitchen.
Come say hi on Instagram—I’d love to hear what you’re cooking.