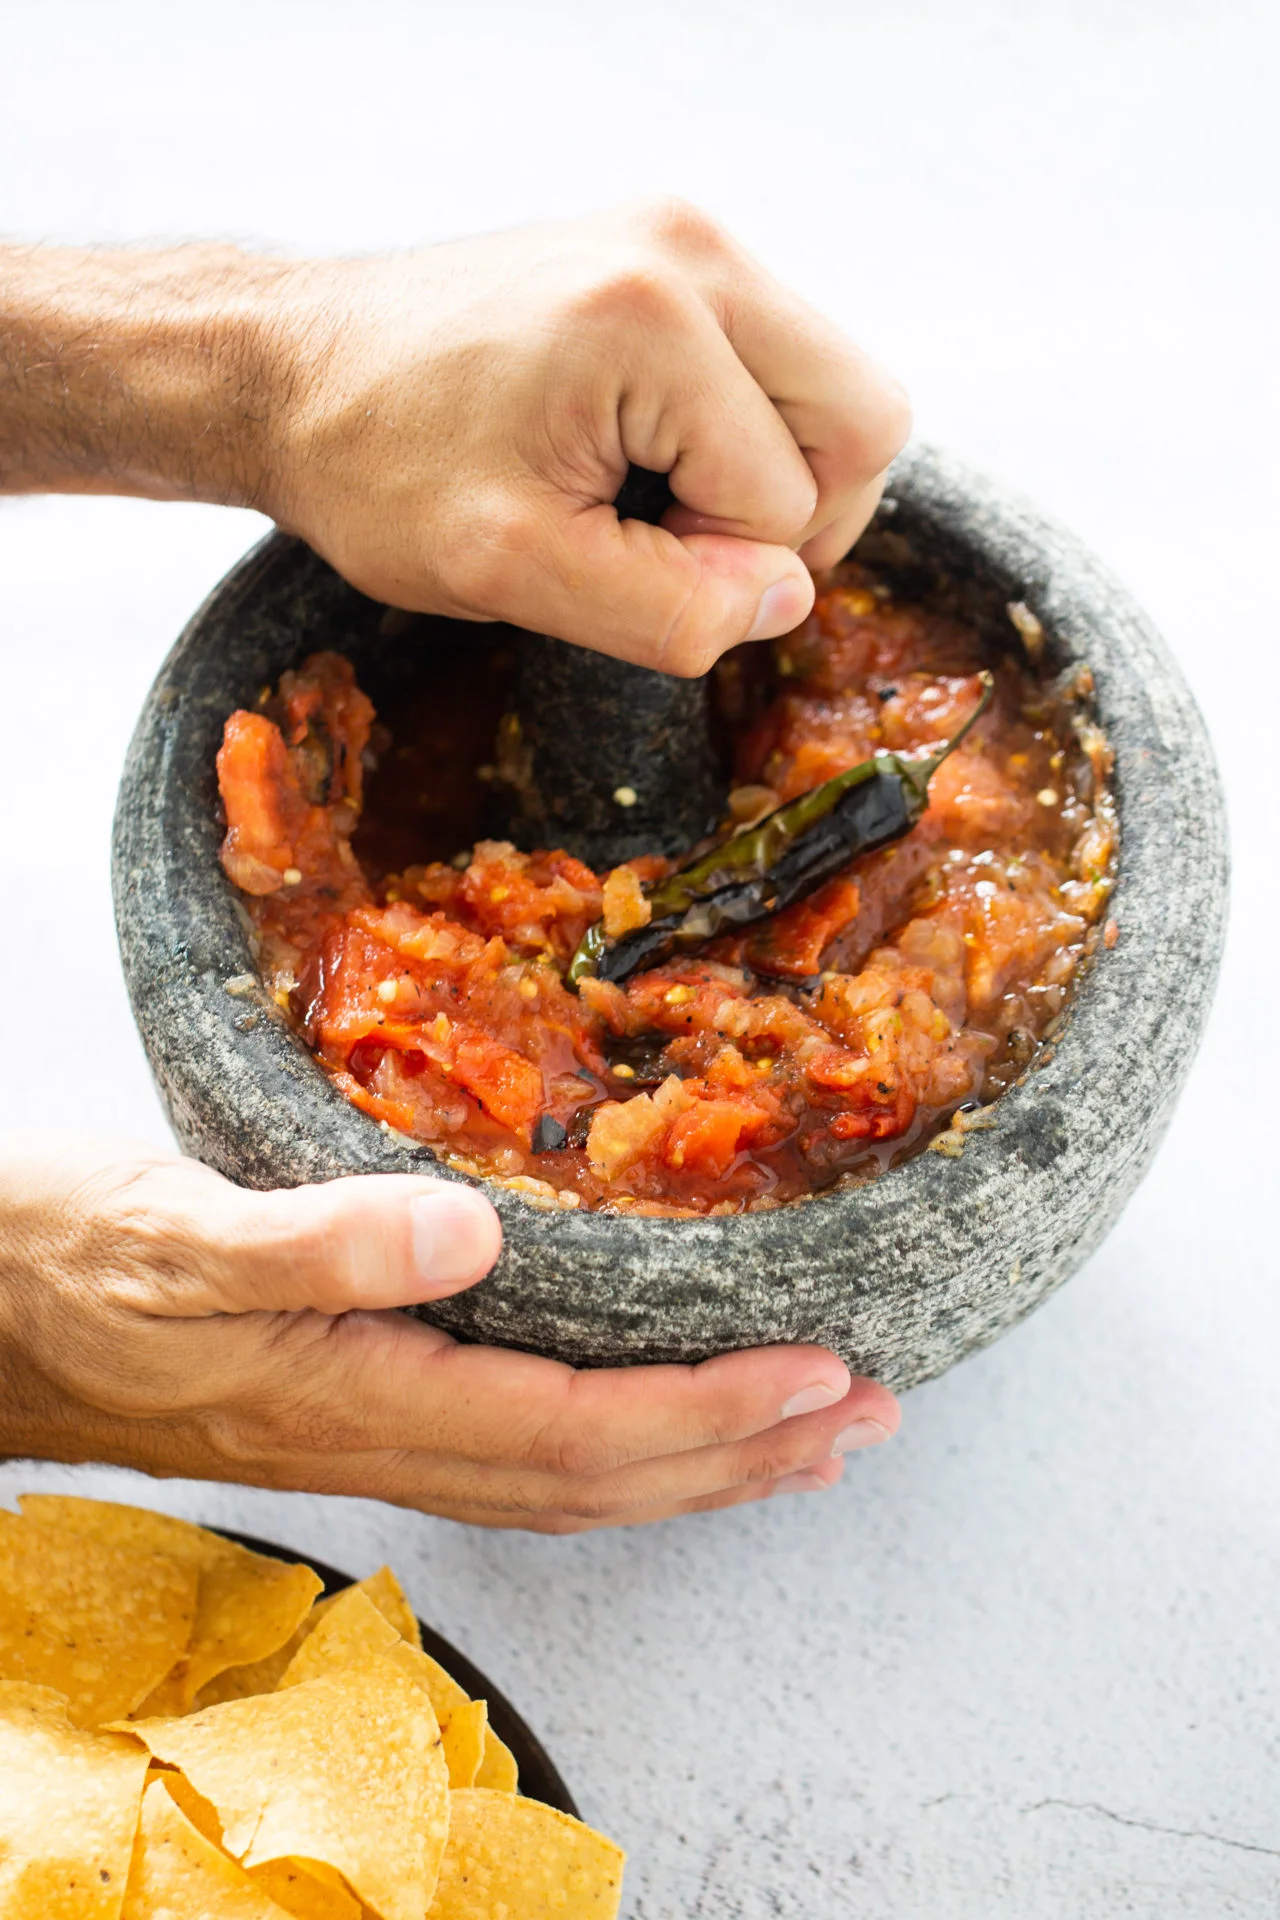
If you’ve ever had a salsa so good it made you pause mid-bite, there’s a good chance it was made in a molcajete. This ancient, lava-rock mortar and pestle has been used in Mexican kitchens for generations, and once you try it, you’ll understand why we still love it.
Whether you’re brand new to the molcajete or want to get more out of yours, this guide will show you everything you need to know: what it is, how to use it, how to care for it, and why it’s worth the (minimal) effort.
About the Molcajete: A Bit of History
The molcajete (pronounced mol-ka-HE-teh) dates back to pre-Hispanic Mesoamerica and was traditionally carved from volcanic rock. Its porous texture is ideal for grinding, and it imparts a rustic, smoky flavor to everything you make in it—from salsa to guacamole to spice blends.
Using one connects you not just to flavor, but to tradition. This isn’t just a tool—it’s part of our culinary heritage.
What Is It Made Of?
Molcajetes are made from volcanic basalt, which is rough, heavy, and incredibly durable. The rough surface helps break down ingredients without turning them into purée—it gives you that chunky, irresistible texture that no blender can replicate.

What is molcajetear?
Molcajetear is the Mexican way of saying that you are using your molcajete; it is not a formal word, it is a way of saying that the ingredients are ground in a molcajete with the help of a tejolote.
Pressing the ingredients against the walls of the molcajete grinds them, helping to bring out their natural flavors and oils.
This technique adds an extra layer of flavor to any dish prepared in an authentic molcajete.
Caring for Your Molcajete
You’ll need to cure or season it the first time you use it. This removes any loose bits of stone.
To season your molcajete:
- Rinse and scrub with a stiff brush.
- Grind uncooked rice in it until the powder stays white—discard and repeat if it turns gray.
- Do this a few times until the rice stays clean, then rinse again and air dry.
To clean it after each use:
Rinse with water and scrub out any food particles. Avoid soap—it can get trapped in the pores and affect the taste of your next recipe. Let it air dry completely before storing.
Molcajete vs. Blender: What’s the Difference?
Yes, a blender is fast. But a molcajete gives you more than just chopped ingredients—it gives you flavor and texture that’s hard to beat. There’s something magical about how a molcajete mingles roasted tomatoes, garlic, and chile heat into something smoky, complex, and real.
Use it for salsas, guacamole, spice mixes, and even marinades. You won’t go back.
What You Can Do With a Molcajete
- Make Traditional Salsas. This is the most iconic use. When you grind roasted tomatoes, chiles, and garlic in a molcajete, you get a rustic texture and a smoky, layered flavor that you just can’t get from a blender. Salsa de molcajete (red roasted salsa), or salsa verde cruda (raw green salsa).
- Prepare Guacamole. Forget smooth, over-mixed guacamole! A molcajete gives you chunky, flavorful guacamole where every bite has creamy avocado, a hit of lime, and just enough bite from jalapeño and onion.
- Grind Spices and Seeds. Use it as a spice grinder! You can crush toasted cumin seeds, coriander, black peppercorns, or even sesame seeds to release their oils and deepen the flavor of your dishes.
- Make Adobos and Marinades. Many traditional adobos (spice pastes) for meats, tofu, or vegetables are made by grinding dried chiles, spices, and garlic together by hand. The molcajete lets you slowly release all the essential oils for a richer flavor.
- Mix and Serve Dips and Sauces. You can mix thick salsas or dips directly in the molcajete and even serve them straight from it! This keeps things looking authentic, rustic, and festive.
Final Thoughts (From My Kitchen to Yours)
There’s something deeply satisfying about making salsa in a molcajete. It’s grounding and flavorful. It reminds me of my grandmother’s kitchen—hot comal, smoky chiles, and tortillas warming under a cloth napkin.
If you’ve never used a molcajete, I hope this post gives you the confidence to try. And if you’ve been using one for years, I hope it reminds you why you love it. ❤️
How to Use a Molcajete
Ingredients
Start with these ingredients
- Tomatoes Roma or vine-ripe: Roast them until the skins blister. Their sweetness balances the heat.
- Garlic cloves: Roast with the skin on for soft mellow flavor.
- Chiles Serrano or jalapeño: Toast until charred. Serranos are spicier, jalapeños are milder—choose based on your heat tolerance.
- Salt: Just a pinch helps everything come together.
- Optional: Add chopped white onion or cilantro at the end for brightness and crunch.
Instructions
Step-by-step basics
- Grind the garlic and salt first. This creates a smooth base to mix the rest of the ingredients into.
- Add the chiles, one at a time. Crush them into the paste. This lets you control the heat.
- Add the roasted tomatoes. Break them up just enough to get that perfectly chunky texture.
- Mix and taste. Adjust salt or chile if needed, and stir in any optional fresh herbs.
information
Nutritional information of this recipe is only an estimate, the accuracy for any recipe on this site is not guaranteed.
