
About this recipe
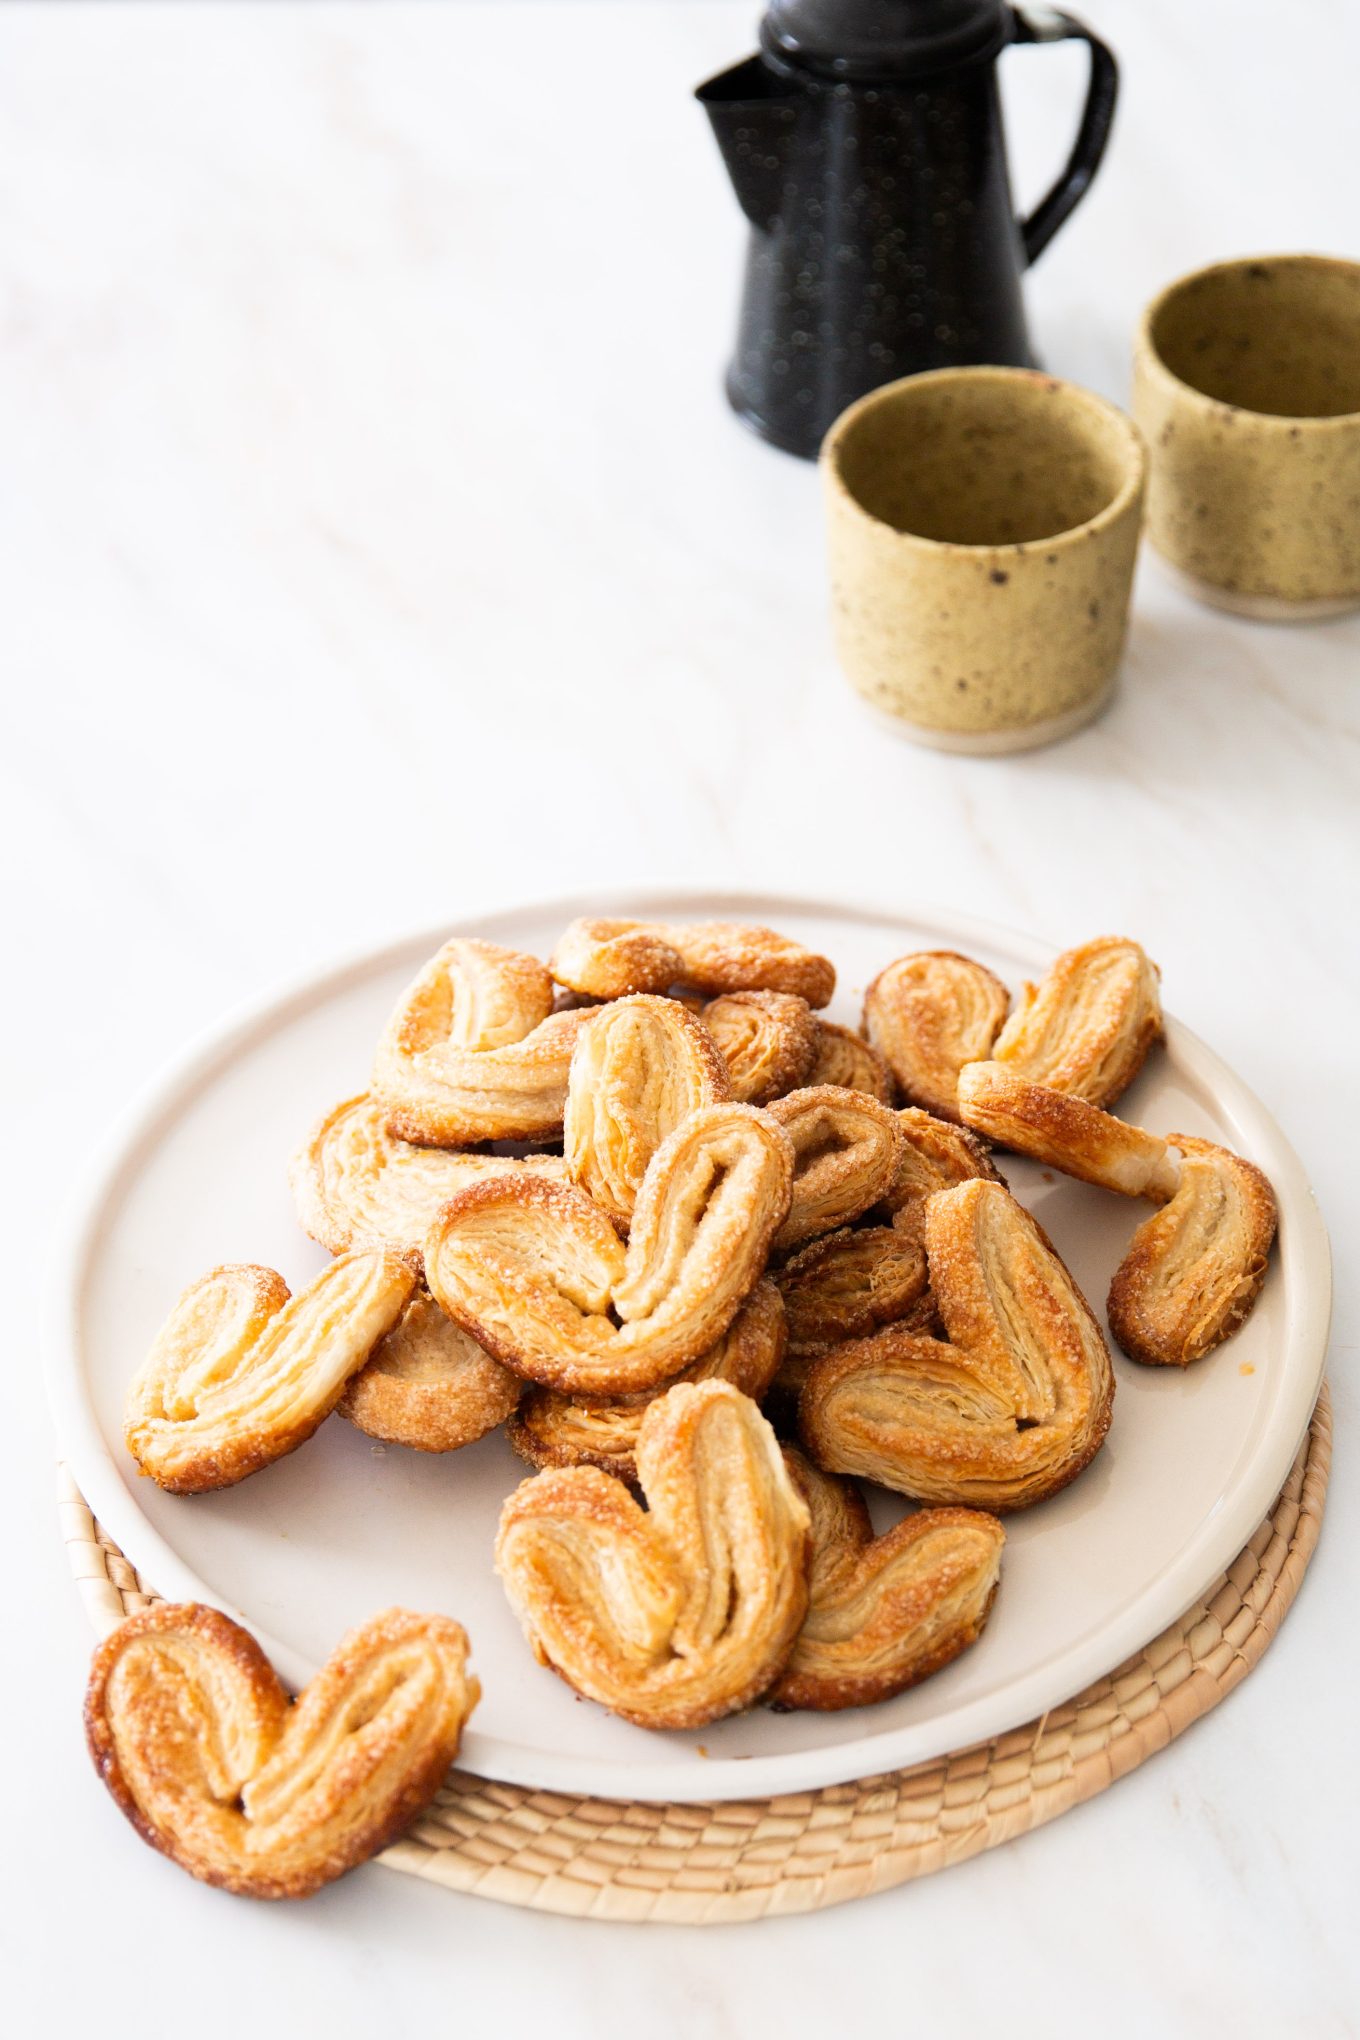
Orejas (Spanish for “ears”) are one of those pan dulce classics that never go out of style. Their shape, texture, and sweetness bring back memories of bakery visits and weekend breakfasts with cafecito or hot chocolate.
These flaky cookies are similar to French palmiers, but they’ve become their own thing in Mexican bakeries. And they have always been my favorite. In las panaderías in Mexico thy are usually pretty biog and thin. But always crunchy on the edges, soft in the middle, and always irresistible.
Why you’ll love this recipe
- Easy and quick: Just 2 main ingredients and ready in under 30 minutes
- Kid-friendly and nostalgic: Feels just like grabbing a treat from a panadería
- Naturally dairy-free with store-bought or homemade vegan puff pastry
- Customizable: Add cinnamon, chocolate drizzle, or make fun shapes!

Ingredient notes
- Puff Pastry. Look for store-bought puff pastry in the freezer section. Most brands are made with butter, but there are also dairy-free options that work great.
- Sugar. Regular granulated sugar works best for caramelizing.
- Optional: Cinnamon or Butter.
How to make orejas pan dulce
- Preparation: Thaw puff pastry according to package instructions.
- Fold the Pastry.
- Cut and Shape the Orejas.
- Bake the Orejas.
- Cool and Serve.
Tips and Variations
- Chocolate Twist: For a chocolatey touch, drizzle some melted chocolate over your Orejas right after they come out of the oven. Add cocoa powder to your sugar mixture for a deeper chocolate flavor.
- Vanilla Infusion: A few drops of vanilla extract with your sugar sprinkle can give your Orejas a sweet, aromatic lift.
- Nutty Addition: Before folding your dough, scatter a handful of your favorite chopped nuts – almonds, pecans, or walnuts work great – for an added crunch and flavor.
- Freezing for Later: Prep Now, Enjoy Later – You don’t have to bake all your Orejas simultaneously. Prepare and cut your dough, then freeze the unbaked Orejas for up to 3 months.
Making Orejas is easier than it seems. This guide will help you make delicious Orejas with a simple recipe. Even if you’re a beginner baker, you can master this Best Pan Dulce recipe with just a few ingredients and basic baking techniques. Orejas are beautiful and versatile.
Orejas Recipe (Mexican Palmiers)
Equipment
- 1 Silicon Mat
- 1 Rolling Pin
Ingredients
- 1 sheet of vegan puff pastry thawed
- 1/4 cup of granulated sugar
Optional
- 1 teaspoon of ground cinnamon
- 1 tablespoon of melted vegan butter
Instructions
- Begin by preheating your oven to 400°F (200°C). Line a baking sheet with parchment paper to prevent the Orejas from sticking.
- Roll out the thawed puff pastry on a clean surface. If it’s not perfectly rectangular, you can gently roll it out a bit to even it out.
- If you’re using the melted vegan butter, brush it lightly over the pastry. This step is optional but adds a rich flavor.
- Mix the sugar with cinnamon (if using) and sprinkle this mixture evenly over the puff pastry. The cinnamon adds a warm flavor, but you can skip it for a more traditional taste.
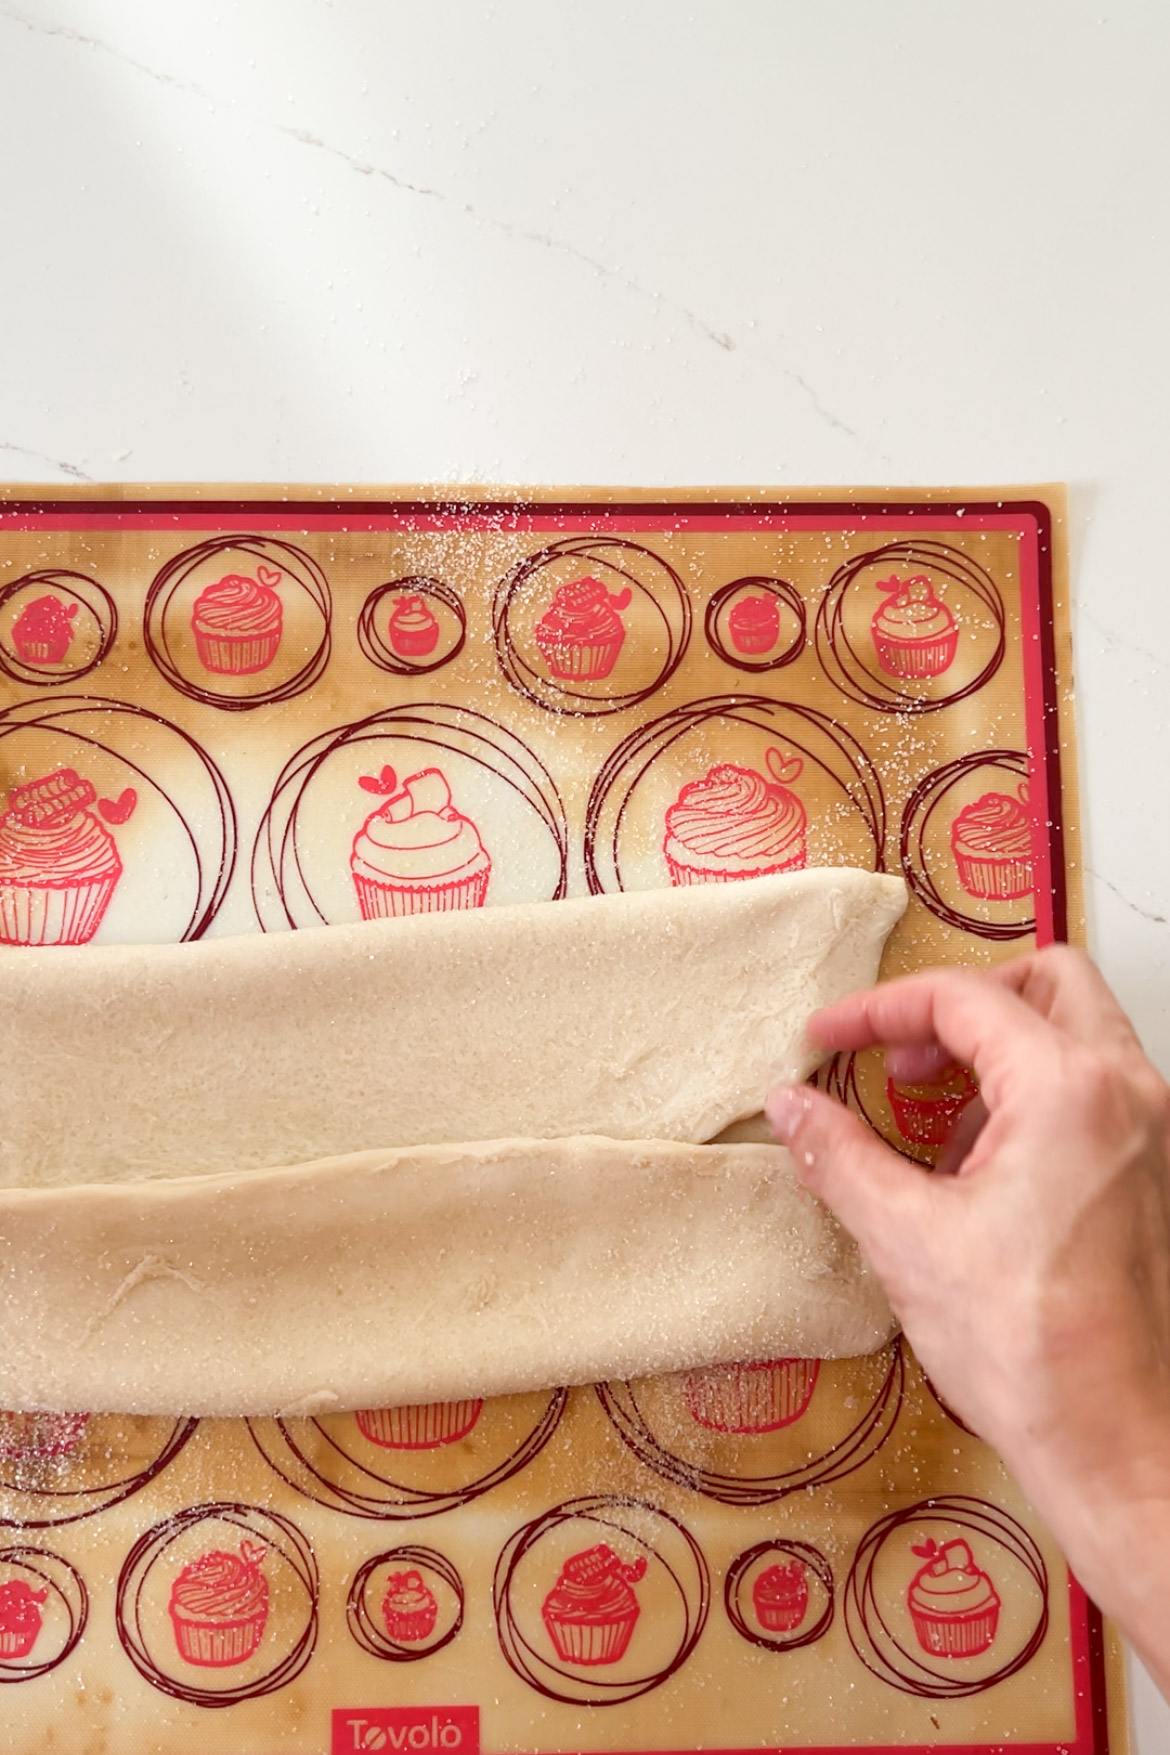
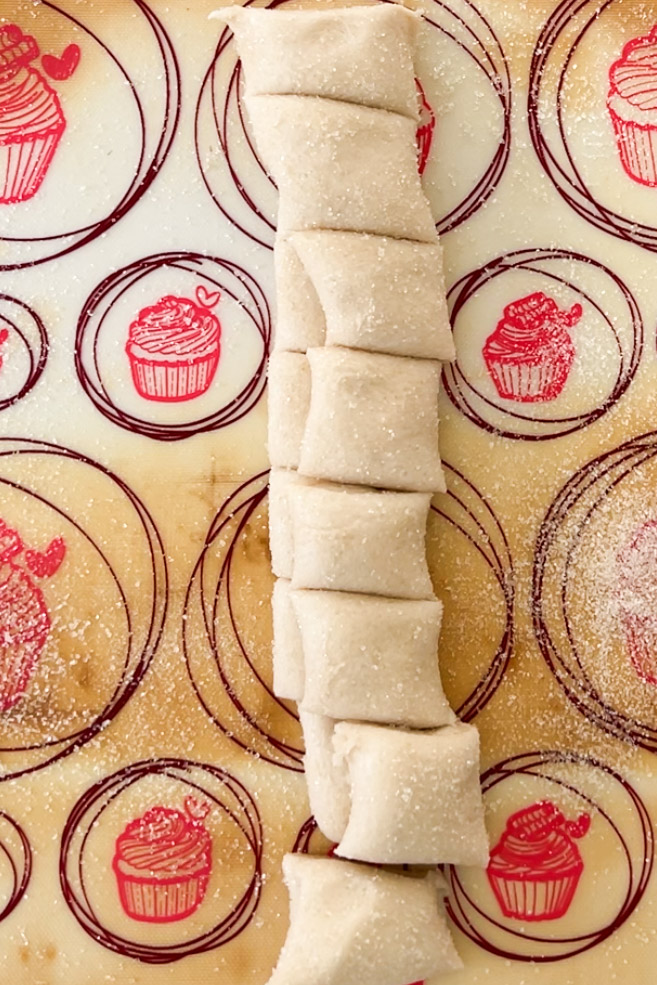
- Fold the long sides of the pastry toward the center. Then, fold them again so the two folds meet in the middle of the dough.
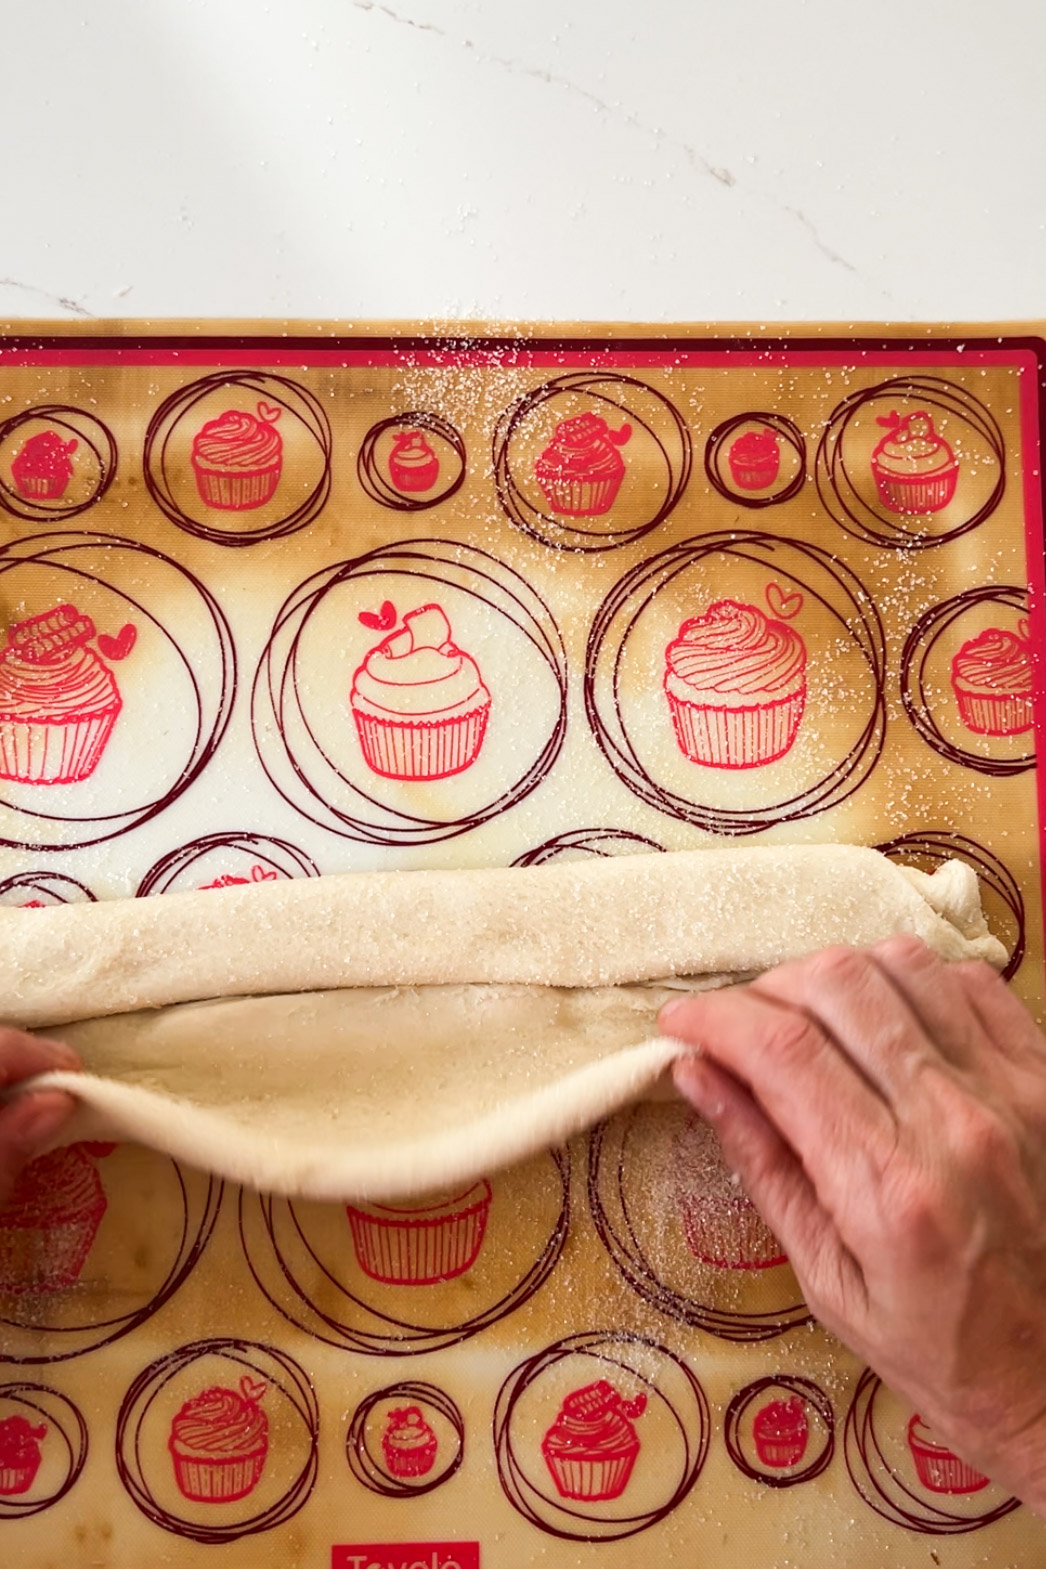
- Finally, fold one half over the other half, like closing a book. You should have a long, narrow strip.
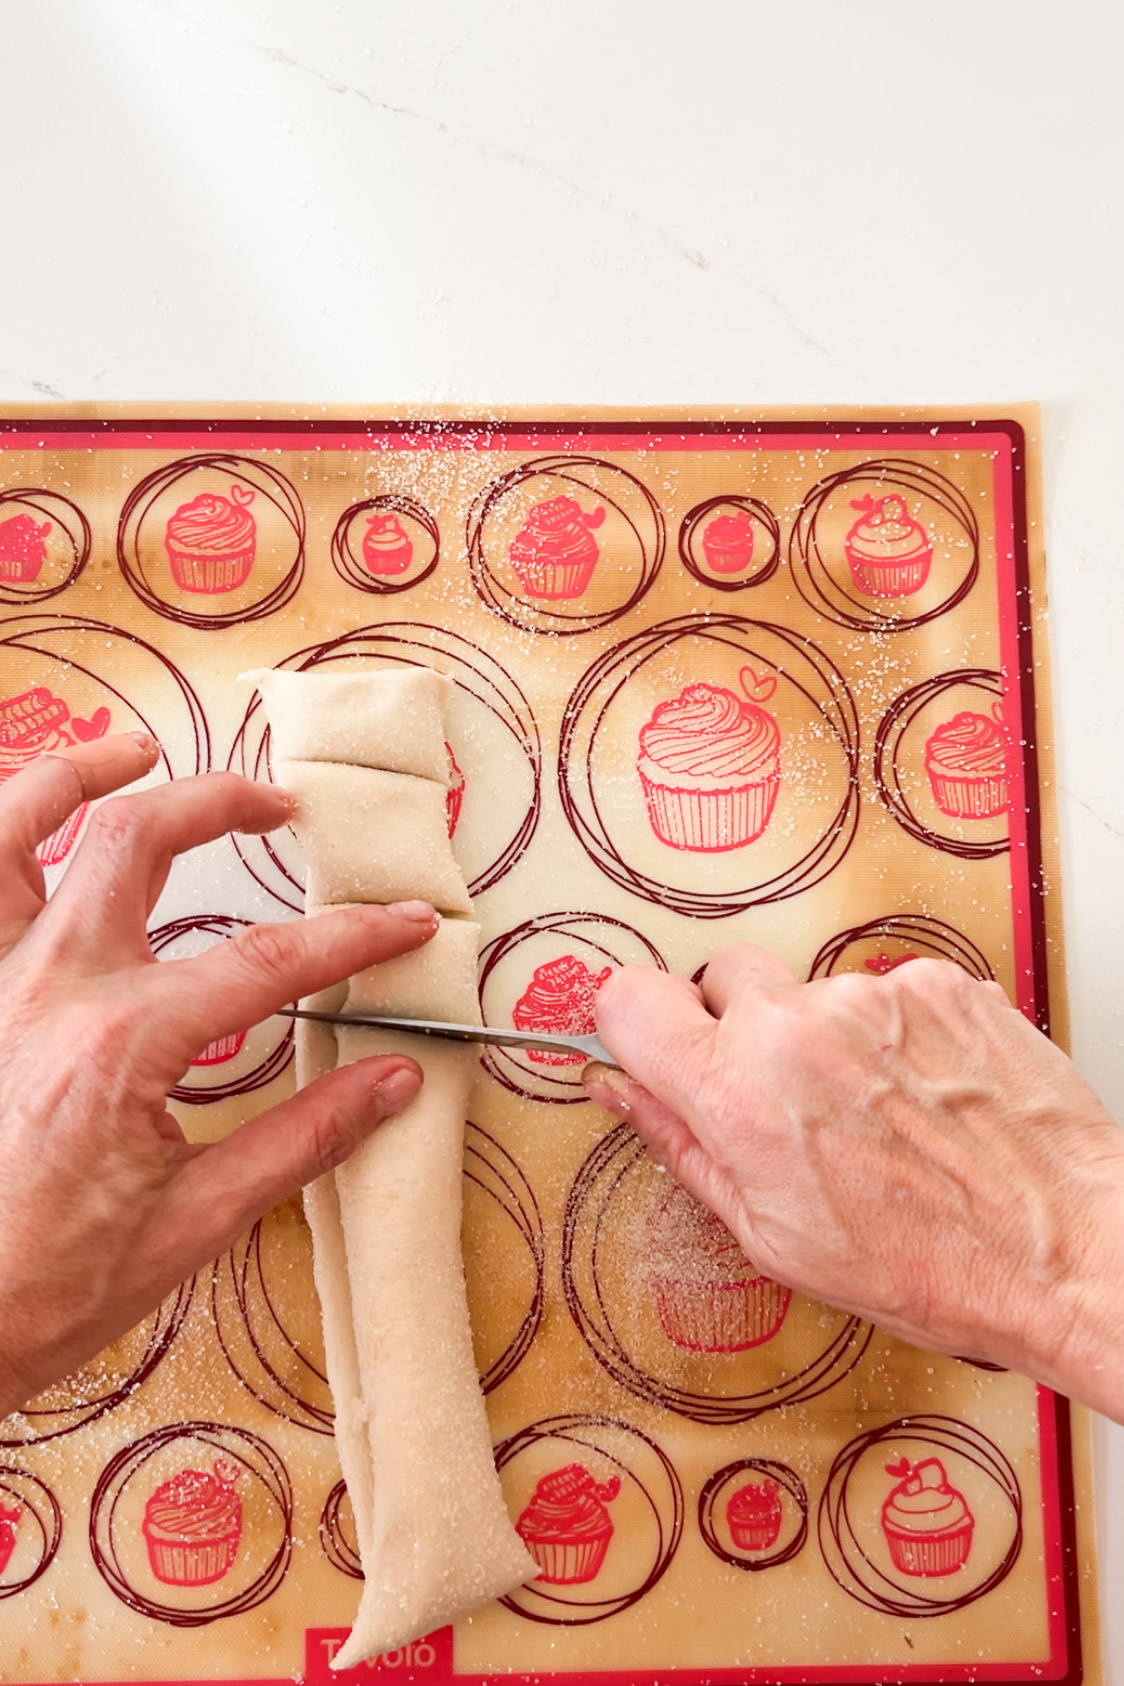
- Using a sharp knife, cut the dough into slices about 1/2 inch thick. These slices will expand during baking, so don’t make them too thick.
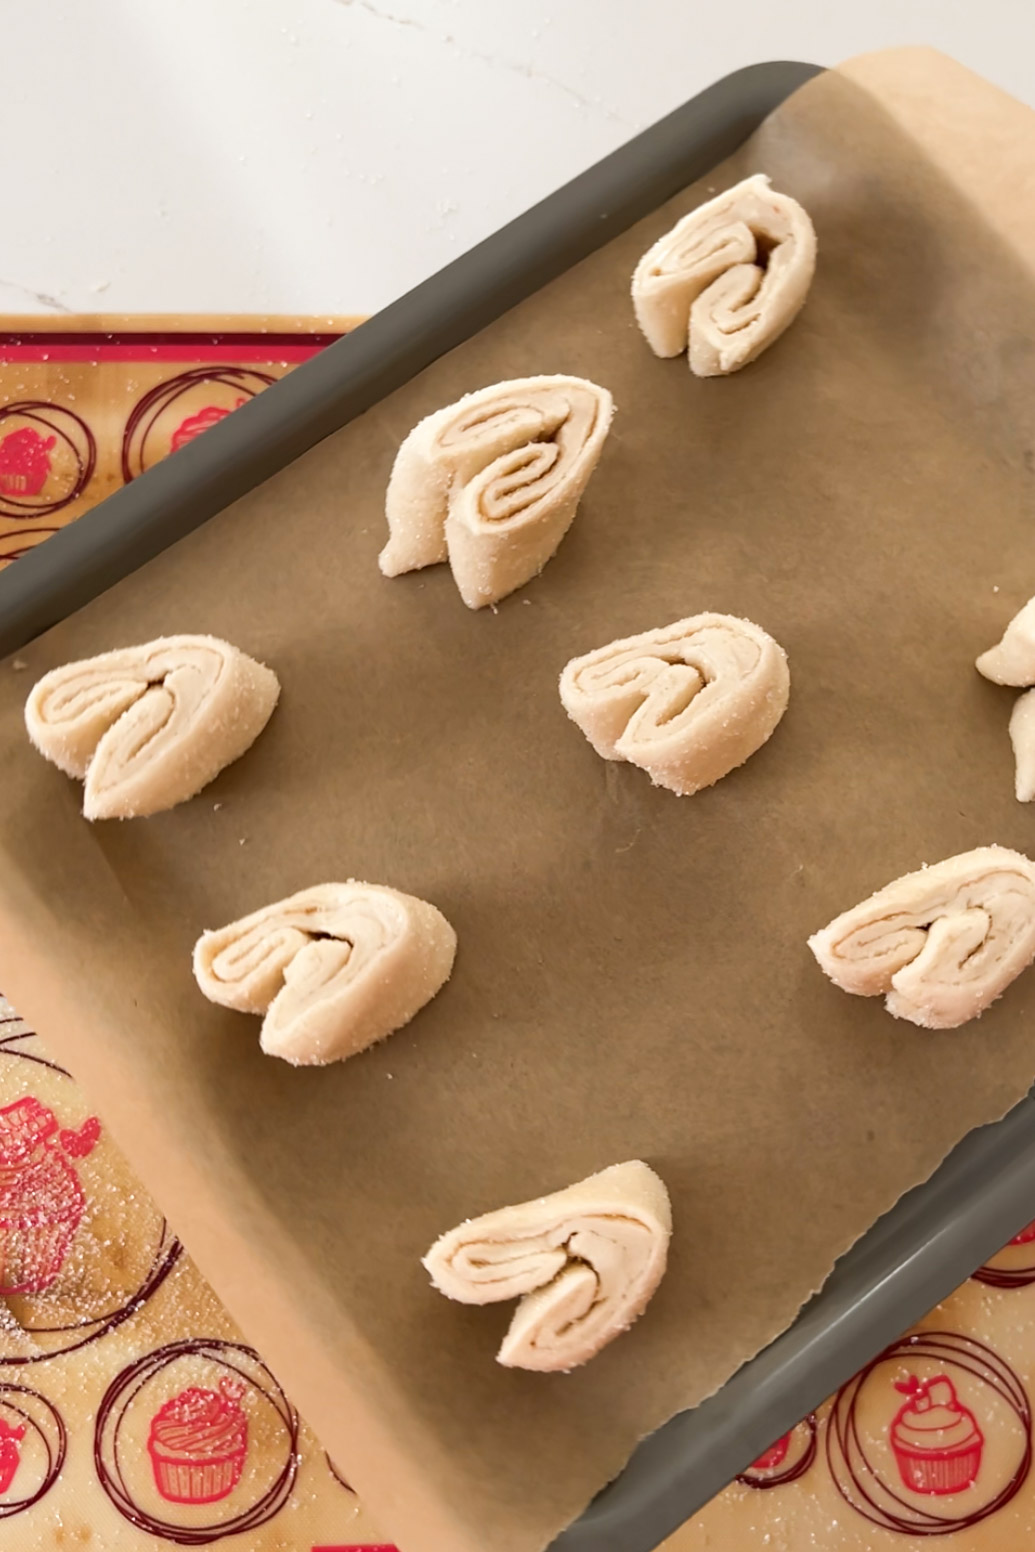
- Place the slices cut side up on your prepared baking sheet, ensuring they have space to expand.
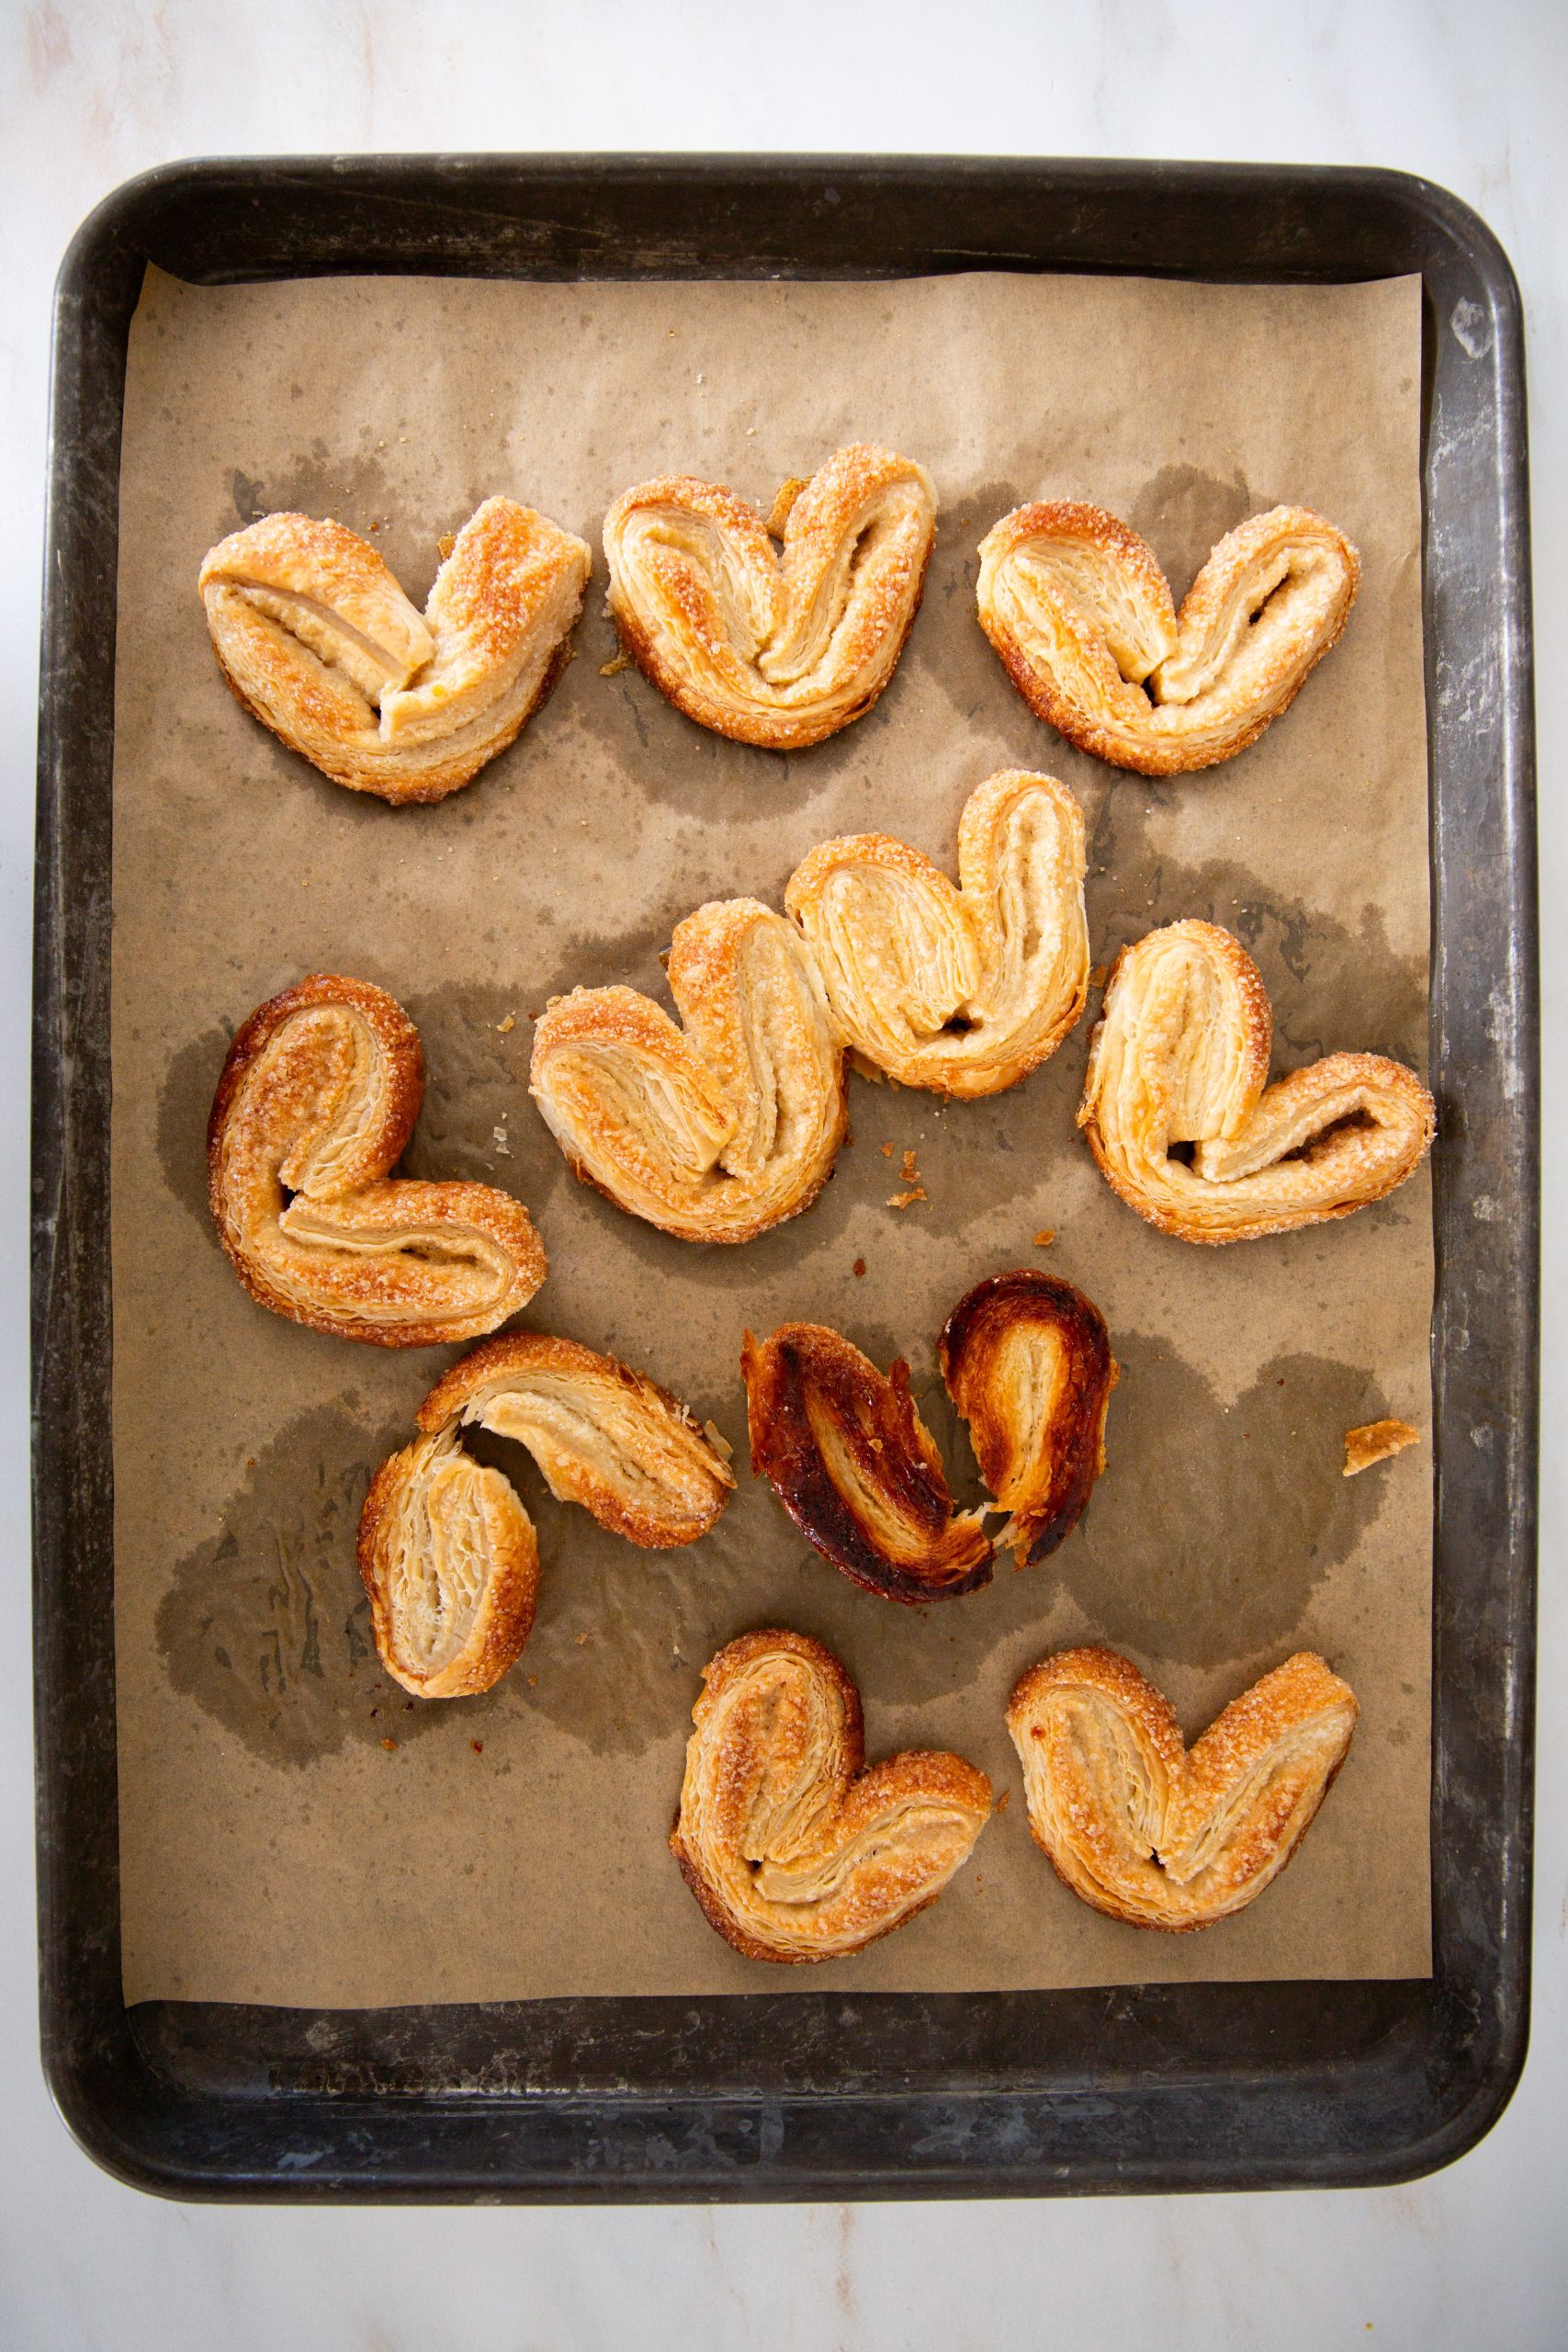
- Bake in the preheated oven for about 15 minutes, or until they puff up and turn a light golden brown. For even browning, you can flip them halfway through baking.
- Once baked, remove the Orejas from the oven and let them cool on the baking sheet for a few minutes before transferring them to a wire rack.
- Serve once they’re cool enough to handle but still deliciously warm.
Notes
- Don’t let the dough get too warm—it’ll be harder to shape and won’t puff as much.
- Roll gently—pressing too hard flattens the layers.
- Flip carefully with a spatula at the halfway point to get both sides nice and golden.
- Store leftovers in a tin to keep them crisp!
Nutrition
information
Nutritional information of this recipe is only an estimate, the accuracy for any recipe on this site is not guaranteed.

Hi, I’m Ale Graf!
I’m a Mexican home cook based in Texas and the voice behind AleCooks and Piloncillo & Vainilla.
I create easy, family-friendly recipes with Mexican roots and a plant-forward mindset—always flexible and made to bring people together. I’m also the co-author of Yo Cocino Latino and love helping home cooks feel more confident in the kitchen.
Come say hi on Instagram—I’d love to hear what you’re cooking.